How to add a stylish sidebar image buttons to Thesis Theme, get PSD and Sample Files for FREE

Some bloggers think and feel that Thesis Theme is kind of ugly and they would like to have a custom theme with a unique style, and this is what we was trying to do here on FamousBloggers blog, and we have succeeded so far to style and change the ugly face of Thesis theme and turned to something else probably most of you will NOT notice it’s Thesis Theme anymore, Don’t you think so?
So.. In this tutorial I am going to show you how to make a sidebar buttons for Thesis Theme, so it’s not a navigation buttons but you can use it the way you like and you think it will work for you. We will use images, CSS and some HTML code to past simply to your side bar text widget, although it’s not for WordPress blogs only, it’s not also for Thesis Theme only, but if you are using any other blogging platform and it’s not of the thesis examples, or you have a static website, and you know where to add the HTML code to display the buttons on your sidebar then this tutorial will work for you just fine. You can see them working on our FamousBloggers blog sidebar.
What you will need?
Basically you will need some HTML and CSS knowledge to customize the code the way to fit your blog, and also some graphic buttons to use them on your blog sidebar, and because I don’t know how you sidebar looks like and what is the specific width, height and color theme you prefer to have for your buttons, so I will not include ready made buttons for you, but I will give you the original PSD file that I am using to create FamousBloggers blog sidebar buttons as a gift, for free, so you can start working using it to create your custom web page buttons, and I will also tell you from where to get free set of icons to include them to your buttons if you would like to make look more professional, and this means you will need to have some little skills with:
So you can get benefit of this tutorial.
From where I get my icon sets?
Almost all icons and images I use on my designs are from the icon finder search iconfinder.com, I remember this website one year back when it was hard to find what you really need on it, but now it has more awesome icons sets that I use for designing logo and buttons in both ICO and PNG formats, you will love it.
Download PSD file and Sample Buttons
First of all download our PSD file and our image samples, the PSD file has the basic layers to create the buttons with a gray background, it will allow you easily to change the buttons colors and/or gradient colors for the mouse over effect by playing with it’s style, and of course change the size of buttons. You can also choose the icons that match your need from the icon finder iconfinder.com website and just replace them with the ones on the PSD file. Now you will be able to easily generate your own buttons.

Also you will need a sprite.png transparent image to replace it with the text of your links, and this is why we included the folder of our sidebar_buttons for you to check it out so you can get the full picture of what we did exactly to create these sidebar buttons.
Download the Sidebar buttons PSD + Sidebar sample buttons Folder
CSS style your sidebar buttons
Copy and past this code to your custom.css file and don’t forget to change the (URL_TO_BUTTON_IMAGE) to point to the right path where your button images are saved on your hosting server, and of course upload your custom.css file back to your server after editing it, this code is a style for two buttons, you can add more buttons and style them as well using the same way.
/*---------------------------------*/
/* Sidebar buttons BOX */
/*---------------------------------*/
.sb-buttons ul li a {background:url("URL_TO_BUTTON_IMAGE/sprite.png") no-repeat scroll 0 0 transparent; display:block; text-indent:-9999px; width:300px;}
li.sb_write a:link, li.sb_write a:visited {display: block; width: 300px; height: 70px; background: url('URL_TO_BUTTON_IMAGE') no-repeat scroll 0px 0px; outline: none;}
li.sb_write a:hover {display: block; width: 300px; height: 70px; background: url('URL_TO_BUTTON_IMAGE') no-repeat scroll 0px 0px; outline: none;}

li.sb_mmo a:link, li.sb_mmo a:visited {display: block; width: 300px; height: 70px; background: url('URL_TO_BUTTON_IMAGE') no-repeat scroll 0px 0px; outline: none;}
li.sb_mmo a:hover {display: block; width: 300px; height: 70px; background: url('URL_TO_BUTTON_IMAGE') no-repeat scroll 0px 0px; outline: none;}
/*------------ End of Sidebar buttons BOX ---------------------*/
HTML Code
After you generate your files upload them to a folder in your host server, so you can call them to view them where you want using this code, just make sure to change the (Page_Link) to the URL you want. This code is going to add two buttons and of course you add more, but don’t forget to create a separate style for each one in your custom.css file the same way we did above.

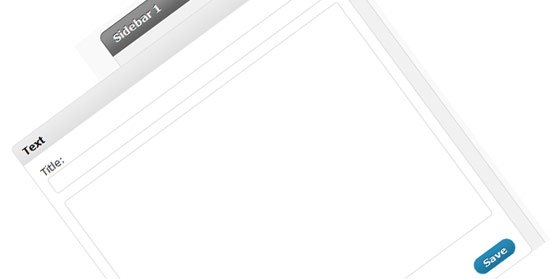
To show the buttons on your sidebar you will need to add a text widget by going to Appearance > Widgets > and simply add a test widget to your sidebar where you want the buttons to show and past the HTML code into it and save it.
Conclusion
There are some simple ways to customize your WordPress blog theme. Working with Thesis Theme is a lot of fun and it will teach you so many things while working with it, it’s the theme that can teach me by involving me on it’s code and style. You can get amazing icons and PNG files for your design from the icon finder search at iconfinder.com, and the awesome thing is it’s for FREE.
Credits:
I have got this idea from ProBlogDesign.com blog. I like the design of this blog.

 What’s Up Bloggers! Roundup #8 with Don Sturgill
 What is Keeping Your Blog from Making Money?
 10 Techniques how to Start a Blog Post to Engage Readers to Stay on Page
 What’s Up Bloggers! Roundup #7 with Christopher Jan Benitez
{ 79 Responses }